[MachineLearning] 요리지역분류(3)
포스팅에 앞서 본 내용은 ML-For-Beginners를 요약 정리하며 공부한 것임을 알려드립니다.
머신러닝 - 음식지역 분류
음식분류 웹앱 만들기
이전 포스팅에서 만든 모델을 웹앱에서 바로 사용가능하며, 로컬서버에서 간단히 구현해본다.
model.onnx와 같은 디렉토리에 index.html파일을 생성한다. index.html의 내용은 아래와 같다.
<!DOCTYPE html>
<html>
    <header>
        <title>Cuisine Matcher</title>
    </header>
    <body>
        <h1>Check your refrigerator. What can you create?</h1>
        <div id="wrapper">
            <div class="boxCont">
                <input type="checkbox" value="4" class="checkbox">
                <label>apple</label>
            </div>

            <div class="boxCont">
                <input type="checkbox" value="247" class="checkbox">
                <label>pear</label>
            </div>

            <div class="boxCont">
                <input type="checkbox" value="77" class="checkbox">
                <label>cherry</label>
            </div>

            <div class="boxCont">
                <input type="checkbox" value="126" class="checkbox">
                <label>fenugreek</label>
            </div>

            <div class="boxCont">
                <input type="checkbox" value="302" class="checkbox">
                <label>sake</label>
            </div>

            <div class="boxCont">
                <input type="checkbox" value="327" class="checkbox">
                <label>soy sauce</label>
            </div>

            <div class="boxCont">
                <input type="checkbox" value="112" class="checkbox">
                <label>cumin</label>
            </div>
        </div>
        <div style="padding-top:10px">
            <button onClick="startInference()">What kind of cuisine can you make?</button>
        </div>
    </body>
</html>
각 checkbox는 value는 데이터셋의 특성을 인덱싱값이며 예를 들어 apple의 value 4는 데이터셋에서 5번째 특성으로 인덱싱은 0에서부터 시작한다.
Onnx Runtime import 하기
index.html의 header에 아래의 코드를 추가한다.
<script src="https://cdn.jsdelivr.net/npm/onnxruntime-web@1.9.0/dist/ort.min.js"></script>
Runtime을 추가한 후 아래의 코드도 삽입한다.
<script>
    const ingredients = Array(380).fill(0);

    const checks = [...document.querySelectorAll('.checkbox')];

    checks.forEach(check => {
        check.addEventListener('change', function() {
            // toggle the state of the ingredient
            // based on the checkbox's value (1 or 0)
            ingredients[check.value] = check.checked ? 1 : 0;
        });
    });

    function testCheckboxes() {
        // validate if at least one checkbox is checked
        return checks.some(check => check.checked);
    }

    async function startInference() {

        let atLeastOneChecked = testCheckboxes()

        if (!atLeastOneChecked) {
            alert('Please select at least one ingredient.');
            return;
        }
        try {
            // create a new session and load the model.

            const session = await ort.InferenceSession.create('http::/localhost:8080/model.onnx');

            const input = new ort.Tensor(new Float32Array(ingredients), [1, 380]);
            const feeds = { float_input: input };

            // feed inputs and run
            const results = await session.run(feeds);

            // read from results
            alert('You can enjoy ' + results.label.data[0] + ' cuisine today!')

        } catch (e) {
            console.log(`failed to inference ONNX model`);
            console.error(e);
        }
    }
</script>
위 코드가 하는 일은 아래와 같다.
- 길이가 380에 (1 또는 0)이 들어가는 어레이를 생성한다. 이 어레이는 체크박스에 체크가 되면 value값의 위치에 1이 들어간 어레이를 모델로 전달한다.
- 체크박스를 완료한 후 체크완료 버튼을 누르면
init함수가 실행되며 앱이 실행된다. 체크박스가 변할 때 이벤트 리스너가 작동되어 어레이는 실시간으로 변화한다. - 어느 체크박스가 체크되었는지 확인하는
testCheckboxes함수를 생성한다. - 버튼이 눌렸을 때,
startInference함수를 사용하여 예측을 시작한다. - 예측하는 과정
- 동기적으로 모델을 가져와 준비한다.
- Tensor structure를 만들어 모델에 보낸다.
- 모델 훈련할 때 만들어진 input인
float_input을 반영하는 ‘feeds’를 생성한다. - ‘feeds’를 모델에 보낸 후 결과값을 기다린다.
const session = await ort.InferenceSession.create(‘http::/localhost:8080/model.onnx’);
localhost: 다음 포트번호는 node에서 local 서버를 실행할 때 설정한 포트번호를 입력한다.
npx local 서버 실행
- 터미널에서
index.html과model.onnx가 설치된 디렉토리로 이동한다. - 아래의 명령어를 입력한다.
npx light-server -s . -p 80808080번 포트는 변경해도 되지만 변경한다면 위에 외부 자바스크립트 코드를 삽입할 때 포트번호도 수정해야한다. - chrome에서 http://localhost:8080/index.html 로 이동한다.
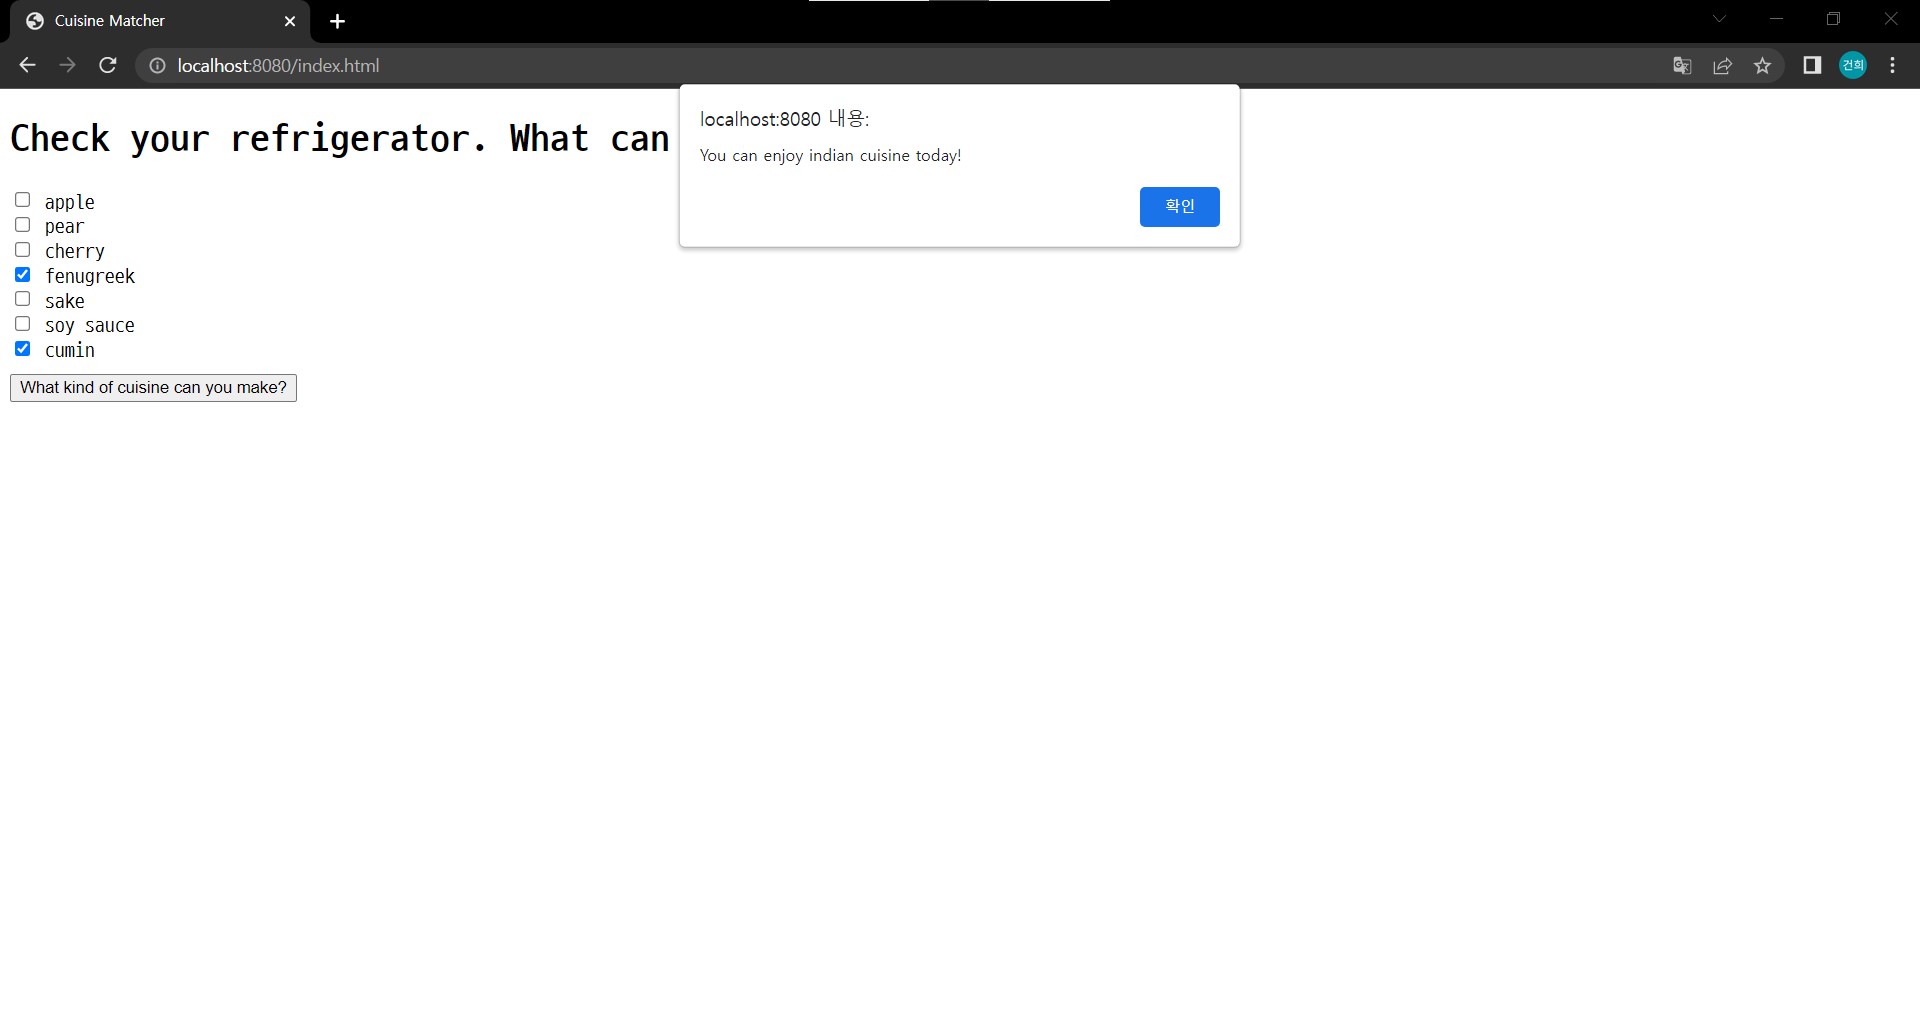
앱 테스트 화면

아쉬운 점
모델 선택에 있어 교차검증을 통해 훈련중 검증셋에 대한 정확도를 가지고 평가한 후 그리트탐색이나 랜덤탐색을 사용하여 모델의 최적의 파라미터를 찾아서 훈련시키면 더 좋은 모델을 만들 수 있었을 것 같다.
Leave a comment