[MachineLearning] Flask web app 만들기
머신러닝 - Flask web app 만들기
이 포스팅은 Build a Web App to use a ML Model을 참고하여 만들었습니다.
소개
이 포스팅에서는 훈련된 모델을 pickle을 사용하여 flask앱에서 사용하는 방법을 정리할 것이다.
머신러닝으로 훈련된 모델을 웹앱에서 사용할 때 고려해야할 점
-
웹앱인가 모바일앱인가? 모바일앱으로 만든다면 모델을 IoT 방식으로 사용하게 된다.
TensorFlow Lite를 사용하면 안드로이드 또는 iOS앱을 만들 수 있다. -
모델의 상주위치 cloud인가 local인가
-
오프라인 지원 앱이 오프라인에서도 지원될 것인가
-
모델 훈련에 사용되는 기술은 무엇인가? 목적에 맞게 모델을 훈련할 때 사용하는 tool을 선택해야한다.
-
TensorFlow TensorFlow.js를 사용해 웹앱에서 사용한다면 텐서플로우를 사용할 수 있다.
-
PyTorch ONNX파일로 다운받거나 자바스크립트에서 Onnx Runtime을 사용해 웹앱으로 사용할 수 있다.(Scikit-learn을 사용해도 가능)
-
Lobe.ai or Azure Custom Vision Lobe.ai 또는 Azure Custom Vision을 통해ML Saas(Software as a Service)를 사용한다면 온라인 앱에서 클라우드를 사용하는 맞춤형 API로 export를 지원하기 때문에 많은 플랫폼에서 사용할 수 있다.
-
Tool
이 포스팅에서는 파이썬에서 작동할 Pickle과 Flask를 사용한다.
Flask : 마이크로 프레임워크로 정의된 Flask는 Python을 사용하여 웹 프레임워크의 기본 기능과 웹 페이즈를 빌드하는 템플릿 엔진을 제공한다.
Pickle : Python 객체 구조를 직렬화 또는 역직렬화하는 파이썬 모듈, 모델을 Pickle하면 웹에서 사용하기 위해 구조를 직렬화 또는 평면화한다. 주의할 점은 본질적으로 안전하지 않기 때문에 ‘unpickle’ 메세지가 뜨면 주의해야한다. Pickled된 파일은 .pkl 확장자를 갖는다.
데이터 불러오기
데이터 소개
NUFORC(The National UFO Reporting Center)에서 제공하는 80,000개의 UFO관측기록을 데이터로 사용한다.
목표는 UFO가 발견된 위치와 몇 초동안 발견되었는지 입력하면 발견된 나라를 예측하는 것이다.
import pandas as pd
import numpy as np

ufos = pd.read_csv('https://raw.githubusercontent.com/codingalzi/ML-For-Beginners/main/3-Web-App/1-Web-App/data/ufos.csv')
ufos
| datetime | city | state | country | shape | duration (seconds) | duration (hours/min) | comments | date posted | latitude | longitude | |
|---|---|---|---|---|---|---|---|---|---|---|---|
| 0 | 10/10/1949 20:30 | san marcos | tx | us | cylinder | 2700.0 | 45 minutes | This event took place in early fall around 194... | 4/27/2004 | 29.883056 | -97.941111 |
| 1 | 10/10/1949 21:00 | lackland afb | tx | NaN | light | 7200.0 | 1-2 hrs | 1949 Lackland AFB, TX. Lights racing acros... | 12/16/2005 | 29.384210 | -98.581082 |
| 2 | 10/10/1955 17:00 | chester (uk/england) | NaN | gb | circle | 20.0 | 20 seconds | Green/Orange circular disc over Chester, En... | 1/21/2008 | 53.200000 | -2.916667 |
| 3 | 10/10/1956 21:00 | edna | tx | us | circle | 20.0 | 1/2 hour | My older brother and twin sister were leaving ... | 1/17/2004 | 28.978333 | -96.645833 |
| 4 | 10/10/1960 20:00 | kaneohe | hi | us | light | 900.0 | 15 minutes | AS a Marine 1st Lt. flying an FJ4B fighter/att... | 1/22/2004 | 21.418056 | -157.803611 |
| ... | ... | ... | ... | ... | ... | ... | ... | ... | ... | ... | ... |
| 80327 | 9/9/2013 21:15 | nashville | tn | us | light | 600.0 | 10 minutes | Round from the distance/slowly changing colors... | 9/30/2013 | 36.165833 | -86.784444 |
| 80328 | 9/9/2013 22:00 | boise | id | us | circle | 1200.0 | 20 minutes | Boise, ID, spherical, 20 min, 10 r... | 9/30/2013 | 43.613611 | -116.202500 |
| 80329 | 9/9/2013 22:00 | napa | ca | us | other | 1200.0 | hour | Napa UFO, | 9/30/2013 | 38.297222 | -122.284444 |
| 80330 | 9/9/2013 22:20 | vienna | va | us | circle | 5.0 | 5 seconds | Saw a five gold lit cicular craft moving fastl... | 9/30/2013 | 38.901111 | -77.265556 |
| 80331 | 9/9/2013 23:00 | edmond | ok | us | cigar | 1020.0 | 17 minutes | 2 witnesses 2 miles apart, Red & White... | 9/30/2013 | 35.652778 | -97.477778 |
80332 rows × 11 columns
ufos['country'].value_counts()
us    65114
ca     3000
gb     1905
au      538
de      105
Name: country, dtype: int64
ufos 데이터셋은 80332개 샘플과 11개의 특성을 가지고 있다.
그 중 city state country 열과 발견된 개체의 latitude longitude 열만 사용한다.
ufos = pd.DataFrame({'Seconds': ufos['duration (seconds)'], 'Country': ufos['country'],'Latitude': ufos['latitude'],'Longitude': ufos['longitude']})

ufos.Country.unique()
array(['us', nan, 'gb', 'ca', 'au', 'de'], dtype=object)
ufos.head()
| Seconds | Country | Latitude | Longitude | |
|---|---|---|---|---|
| 0 | 2700.0 | us | 29.883056 | -97.941111 |
| 1 | 7200.0 | NaN | 29.384210 | -98.581082 |
| 2 | 20.0 | gb | 53.200000 | -2.916667 |
| 3 | 20.0 | us | 28.978333 | -96.645833 |
| 4 | 900.0 | us | 21.418056 | -157.803611 |
ufos.info()
<class 'pandas.core.frame.DataFrame'>
RangeIndex: 80332 entries, 0 to 80331
Data columns (total 4 columns):
 #   Column     Non-Null Count  Dtype
---  ------     --------------  -----
 0   Seconds    80332 non-null  float64
 1   Country    70662 non-null  object
 2   Latitude   80332 non-null  float64
 3   Longitude  80332 non-null  float64
dtypes: float64(3), object(1)
memory usage: 2.5+ MB
ufos 자료를 살펴보면 Country 특성에 null값이 존재하는 것을 볼 수 있다.
null값의 자료형은 drop하고 1 ~ 60 초 사이의 시간동안 목격된 sample을 제외한 나머지 샘플도 사용하지 않는다.
ufos.dropna(inplace=True)

ufos = ufos[(ufos['Seconds'] >= 1) & (ufos['Seconds'] <= 60)]

ufos.info()
<class 'pandas.core.frame.DataFrame'>
Int64Index: 25863 entries, 2 to 80330
Data columns (total 4 columns):
 #   Column     Non-Null Count  Dtype
---  ------     --------------  -----
 0   Seconds    25863 non-null  float64
 1   Country    25863 non-null  object
 2   Latitude   25863 non-null  float64
 3   Longitude  25863 non-null  float64
dtypes: float64(3), object(1)
memory usage: 1010.3+ KB
사이킷-런의 LabelEncoder 라이브러리를 사용해 문자열인 Country 특성의 값을 숫자로 변환한다.
from sklearn.preprocessing import LabelEncoder

ufos['Country'] = LabelEncoder().fit_transform(ufos['Country'])

ufos.head()
| Seconds | Country | Latitude | Longitude | |
|---|---|---|---|---|
| 2 | 20.0 | 3 | 53.200000 | -2.916667 |
| 3 | 20.0 | 4 | 28.978333 | -96.645833 |
| 14 | 30.0 | 4 | 35.823889 | -80.253611 |
| 23 | 60.0 | 4 | 45.582778 | -122.352222 |
| 24 | 3.0 | 3 | 51.783333 | -0.783333 |
ufos['Country'].value_counts()
4    23612
1     1266
3      742
0      202
2       41
Name: Country, dtype: int64
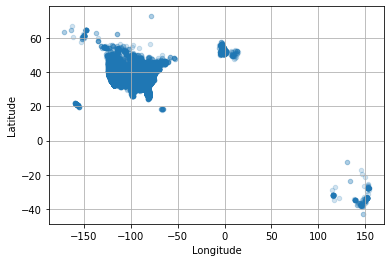
데이터 시각화
import matplotlib.pyplot as plt
# 지리적 데이터 시각화
ufos.plot(kind='scatter', x='Longitude', y='Latitude',
          alpha=0.2,grid=True)
plt.show()
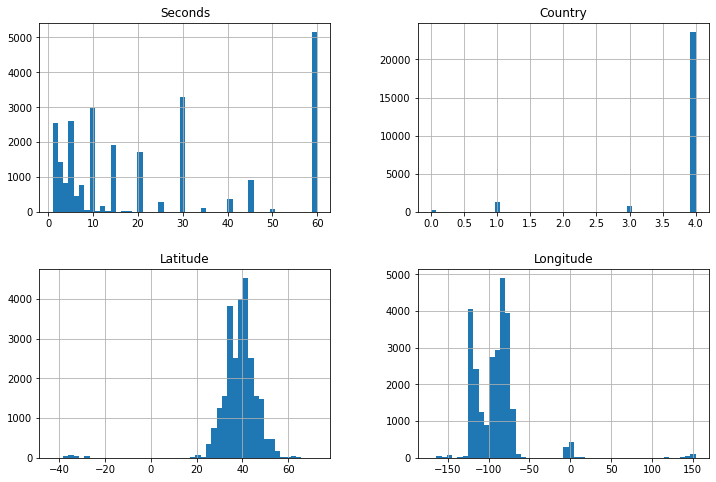
ufos.hist(bins=50, figsize=(12,8))
plt.show
데이터 나누기
label은 Country열이다.
사이킷런의 train_test_split 메서드를 사용해 훈련셋과 테스트셋으로 나눈다.
테스트셋의 비율은 20%로 설정한다.
from sklearn.model_selection import train_test_split

X = ufos.drop('Country', axis=1)
y = ufos['Country']

X_train, X_test, y_train, y_test = train_test_split(X, y, test_size=0.2,
                                                    random_state=42)
모델 선택
모델
- LogisticRegression
- SVC()
- SGDClassifier()
- DecisionTreeClassifier
- RamdomForestClassifier
def train_cross_val(model):
    accuracy = cross_val_score(model, X_train, y_train,
                               cv=10, scoring='accuracy')
    print(f"accuracy: {accuracy.mean()}")
from sklearn.linear_model import LogisticRegression, SGDClassifier
from sklearn.svm import SVC
from sklearn.tree import DecisionTreeClassifier
from sklearn.ensemble import RandomForestClassifier

log_reg = train_cross_val(LogisticRegression())
svm_cls = train_cross_val(SVC())
sgd_cls = train_cross_val(SGDClassifier())
dt_cls = train_cross_val(DecisionTreeClassifier())
rf_cls = train_cross_val(RandomForestClassifier())
accuracy: 0.9592556790720156
accuracy: 0.9516191396810054
accuracy: 0.9528274528757853
accuracy: 0.9986466892218463
accuracy: 0.997438376027066
결정트리분류기의 교차검증결과가 99.86%로 가장 좋다.
이후 규제정도를 달리해서 최적의 하이퍼파라미터를 찾아 모델 튜닝이 가능하지만 이번 목적은 훈련된 모델을 가지고 flask 웹앱을 만드는 것이 목표기 때문에 진행하지 않는다.
from sklearn.metrics import accuracy_score, classification_report
model = DecisionTreeClassifier()
model.fit(X_train, y_train)
predictions = model.predict(X_test)

print(classification_report(y_test, predictions))
print(f"Predictted labels: {predictions}")
print(f"Accuracy : {accuracy_score(y_test, predictions)}")
              precision    recall  f1-score   support

           0       1.00      1.00      1.00        41
           1       1.00      0.98      0.99       288
           2       1.00      1.00      1.00        10
           3       1.00      1.00      1.00       134
           4       1.00      1.00      1.00      4700

    accuracy                           1.00      5173
   macro avg       1.00      1.00      1.00      5173
weighted avg       1.00      1.00      1.00      5173

Predictted labels: [4 4 4 ... 4 4 1]
Accuracy : 0.9988401314517688
테스트셋에 대한 정확도는 99.88%가 나왔다. 위도와 경도를 특성으로 넣어줬기 때문에 Country를 맞추는 것은 당연한 정확도이다.
모델 pickle
이제 훈련된 모델을 웹앱에서 사용하기 위해 pickle시킨다.
파일을 pickle 시킨 후 다시 불러와서 시간 경도 위도를 넣어 예측해본다.
import pickle
model_filename = 'ufo-model.pkl'
pickle.dump(model, open(model_filename, 'wb'))

model = pickle.load(open(model_filename, 'rb'))
print(model.predict([[50,44,-12]]))
[2]
| 나라 | 국가코드 | 인덱싱 |
|---|---|---|
| 호주 | au | 0 |
| 캐나다 | ca | 1 |
| 독일 | de | 2 |
| 영국 | gb | 3 |
| 미국 | us | 4 |
유럽대륙에 가까운 대서양의 지점을 찍었을 때, 독일로 나왔다.
Flask 앱 만들기
훈련한 모델을 사용하는 Flask 웹앱을 만든다.
- web-app 폴더만들기 코드를 적을 notebook.ipynb와 저장한 모델 ufo-model.pkl 파일이 있는 곳에 web-app폴더를 만든다.
- 폴더에 static 폴더와 css 폴더, tamplates 폴더를 만든다. 완성된 디렉토리와 파일은 아래와 같다.
web-app/
  static/
    css/
  templates/
notebook.ipynb
ufo-model.pkl
flask 웹앱을 만들기 전에 아래의 모든 패키지가 깔려있어야 한다.
scikit-learn
pandas
numpy
flask
사용하는 운영체제에 따라 설치해주도록 하자
3개의 파일만 더 만들면 완성할 수 있다.
- 디렉토리 위치에 app.py 파일 만들기
- template/ 안에 index.html 파일 만들기
- static/css/ 안에 styles.css 파일 만들기
styles.css 파일의 내용은 아래와 같다.
body {
	width: 100%;
	height: 100%;
	font-family: 'Helvetica';
	background: black;
	color: #fff;
	text-align: center;
	letter-spacing: 1.4px;
	font-size: 30px;
}

input {
	min-width: 150px;
}

.grid {
	width: 300px;
	border: 1px solid #2d2d2d;
	display: grid;
	justify-content: center;
	margin: 20px auto;
}

.box {
	color: #fff;
	background: #2d2d2d;
	padding: 12px;
	display: inline-block;
}
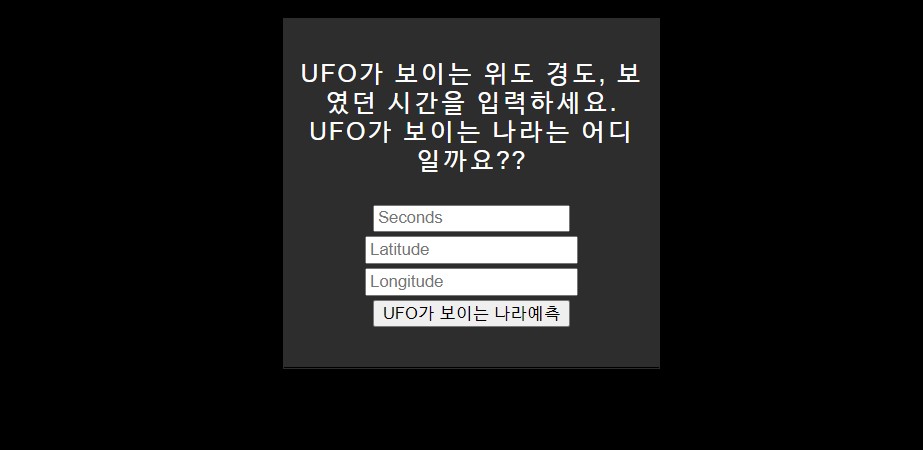
index.html 파일
<!DOCTYPE html>
<html>
  <head>
    <meta charset="UTF-8">
    <title>🛸 UFO가 보이는 나라 예측! 👽</title>
    <link rel="stylesheet" href="">
  </head>

  <body>
    <div class="grid">

      <div class="box">

        <p>UFO가 보이는 위도 경도, 보였던 시간을 입력하세요. UFO가 보이는 나라는 어디일까요??</p>

        <form action="" method="post">
          <input type="number" name="seconds" placeholder="Seconds" required="required" min="0" max="60" />
          <input type="text" name="latitude" placeholder="Latitude" required="required" />
          <input type="text" name="longitude" placeholder="Longitude" required="required" />
          <button type="submit" class="btn">UFO가 보이는 나라예측</button>
        </form>

        <p></p>

      </div>

    </div>

  </body>
</html>
app.py 파일
import numpy as np
from flask import Flask, request, render_template
import pickle

app = Flask(__name__)

model = pickle.load(open("./ufo-model.pkl", "rb"))


@app.route("/")
def home():
    return render_template("index.html")


@app.route("/predict", methods=["POST"])
def predict():

    int_features = [int(x) for x in request.form.values()]
    final_features = [np.array(int_features)]
    prediction = model.predict(final_features)

    output = prediction[0]

    countries = ["Australia", "Canada", "Germany", "UK", "US"]

    return render_template(
        "index.html", prediction_text="Likely country: {}".format(countries[output])
    )


if __name__ == "__main__":
    app.run(debug=True)
debug=True는 개발모드로 코드를 수정하면 앱을 재부팅하지 않고 앱에 반영되도록 설정하는 것이다.
터미널 또는 프롬포트에 python app.py 또는 python3 app.py를 입력해 서버를 실행시킨다.
app.py 파일이 실행과정은 아래와 같다.
- app 시작하면 필요한 패키지들을 불러온 후 app에 flask 객체를 적재한다
- model을 불러온다
- index.html 파일을 home 라우터에 렌더링한다
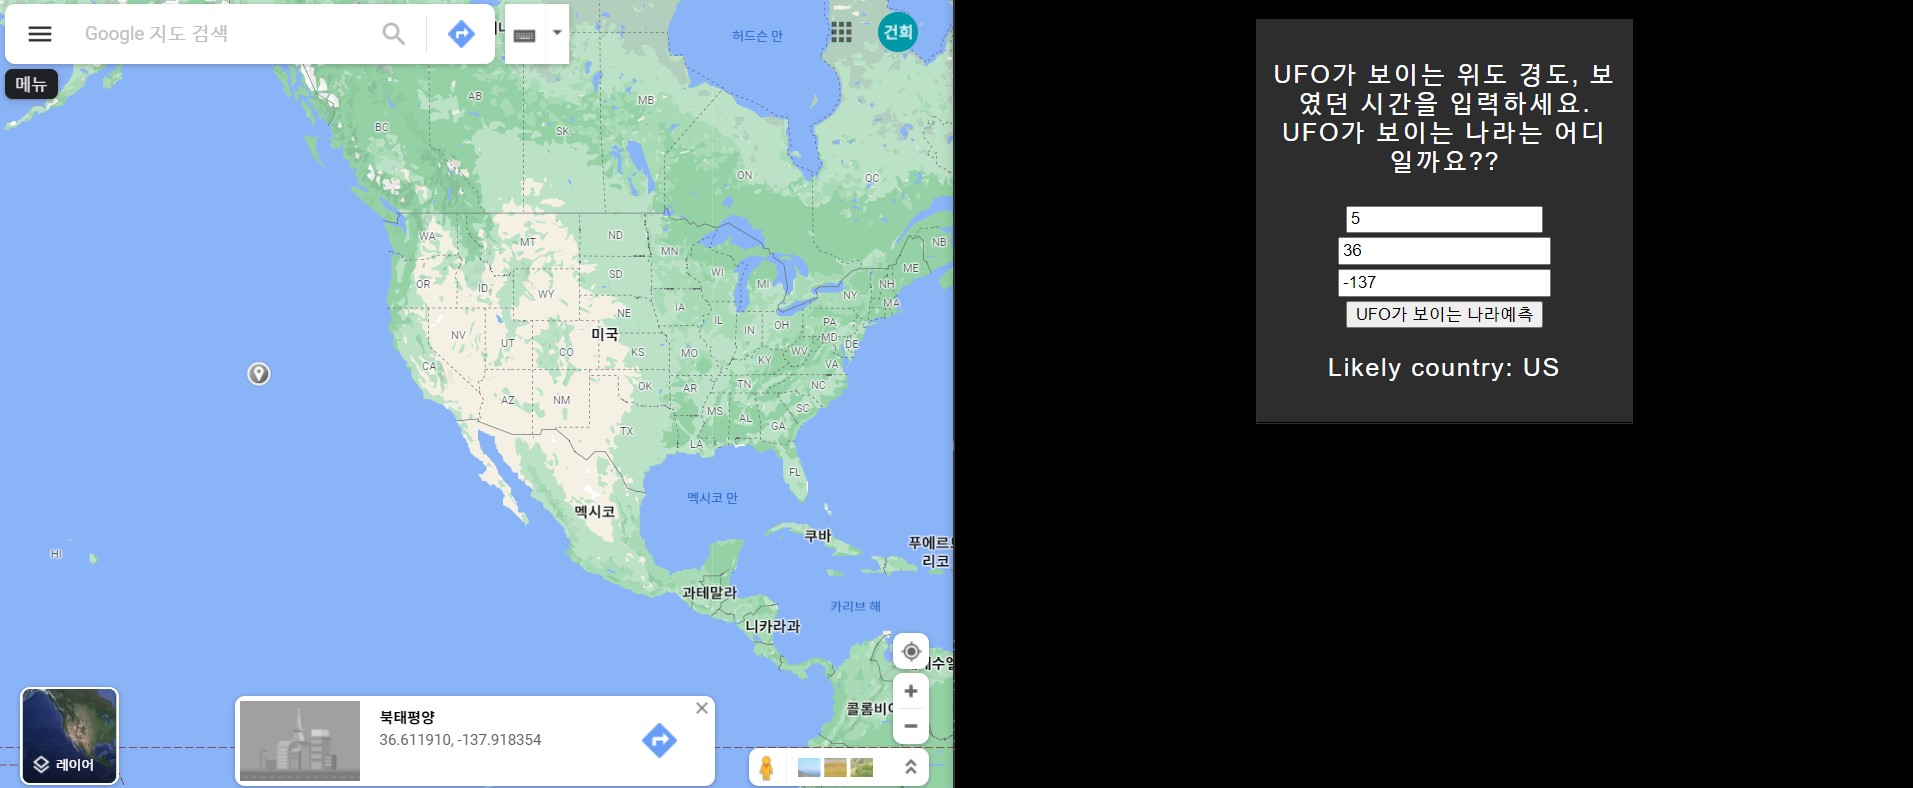
/predict 라우터에서 실행하는 과정은 아래와 같다.
- home라우터에서 버튼을 눌러 post방식으로 predict가 호출이 되면 같이 보낸 요청값들을 request를 통해 받는다.
- 받은 값을 int의 형식으로 list에 저장한 후 numpy.array형태로 변환한다.
- 넘파이 어레이로 변환한 값을 토대로 모델이 예측을 실행한다.
- 예측결과를 나라 인덱스로 사용해 출력한다.
flask와 pickle을 사용해서 모델을 웹앱에 구현하는 것은 비교적 간단하지만 예측을 위해 모델에 입력해야 하는 데이터의 형태를 이해하는 것이 중요하다. 이 예시의 경우 Seconds Latitude Logitude 세개의 데이터를 넘파이 어레이로 묶어서 예측을 진행했다.
실행화면
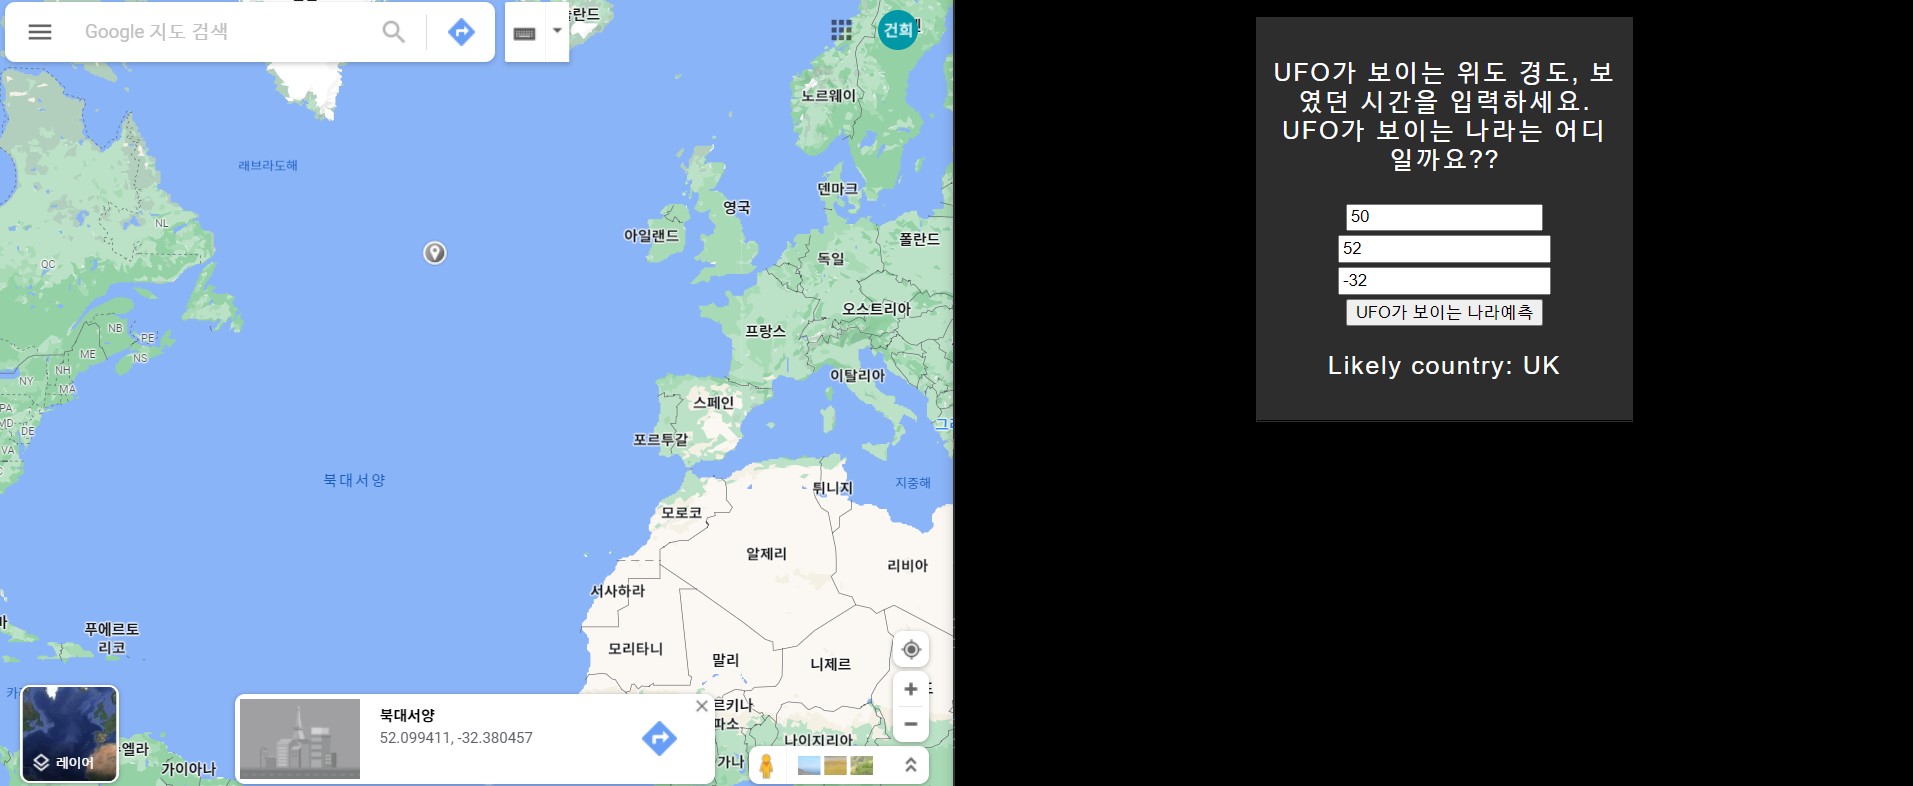
Leave a comment